Mobile Automation Testing on Android
In this blogpost, we will discuss Mobile Automation testing with Robot Framework and Appium Library using PyCharm IDE.
I have taken the app "TED Conferences" from apkpure.com website TED for testing.
You can visit to this website. It has many apps for practising mobile automation testing.
I will try to keep this article much simple into two points.
1. Set Up
2. Test Automation Framework
1.Set Up: You have to install the following
- Install Java from Java8-Mac-Download
- Install Homebrew
- Install Appium Inspector
- Install NodeJs, Python3 and Robot Framework
- Install Pycharm
- Install Robot Framework Appium Library : Incase, if you've already installed that's fine. Otherwise, just run this command on terminal "pip3 install --upgrade robotframework-appiumlibrary" for keeping the latest one!
- Install Appium Doctor - Run command “npm install appium-doctor -g” on your terminal
For, iOS it's Xcode similarly, Install Android Studio for Android.
Click on New project and choose No activity as we are just testing and not doing any coding here!
Click next I chose android 8.1 version as minimum
Click Finish button
Click the SDK Manger on the top
Just make sure you selected your required ones your SDK Platforms. This is just an example! You choose according to your requirements!
Click on apply and click "OK"
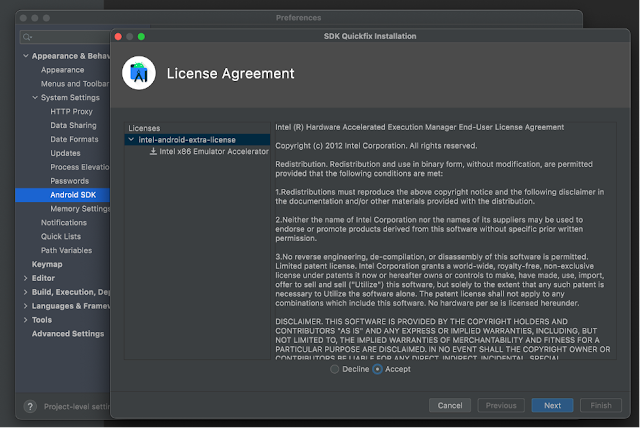
Click Next until it downloads
Click on "Finish" button. You will be on this Screen!
The path is important to keep in mind as this the path of your Android sdk.
Path : /Users/<Your Name>/Library/Android/sdk and Click on "OK".
Now, create an Emulator. Open Android Studio and click on Device Manager
Click on Virtual and click Create Device, You should get a screen like this and select your device
Click "Next"
I have downloaded both S and R
Click "Download"
Click "Finish"
Click "Next"
Click "Finish"
Your Device(Emulator) is now added
Click on "Play" button on your emulator.
- Set your Environment Variables and Path:
Run this command on your terminal: open ~/.zshrc
Your. zshrc file will open and Write your SDK path here
export JAVA_HOME=/usr/libexec/java_home
export ANDROID_HOME=/Users/Jay/Library/Android/sdk
export PATH=$PATH:$ANDROID_HOME/platform-tools
export PATH=$PATH:$ANDROID_HOME/tools
export PATH=$PATH:$ANDROID_HOME/build-tools
export PATH=$PATH:$JAVA_HOME/bin
Close your .zshrc file and run this command “source ~/.zshrc” on your terminal.
- Run Appium Doctor to check Configurations are correct:
Run the command: appium-doctor --android to check whether your configurations are correct
It says the directory is not set or not found. So set your JAVA_HOME Environment variable correctly.
export JAVA_HOME=/Library/Java/JavaVirtualMachines/jdk1.8.0_333.jdk/Contents/Home
export PATH=$PATH:$JAVA_HOME/bin
After fixing, it should work! Ensure you have your correct bin path set correctly
Now, Run the command adb devices to see your emulator listed and you will get the UDID from here. Here, UDID is emulator-5554
Run the command: Emulator -list-avds
To get the desired capabilities – “platformVersion”
Run command: adb shell getprop ro.build.version.release
you will get the version. My version is “11”
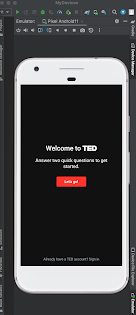
Install Apk file on your Mobile Emulator: Drag and drop your .apk file from your desktop to your emulator. It will install the app on your emulator
Other way on Installing apk is : Run command on Terminal : adb -s emulator-5554 install /Users/Jay/Desktop/TED.apk
Now, Open the app on your emulator and check the app package name and app activity.
Run this command on your terminal: adb shell dumpsys window | grep -E 'mCurrentFocus' So here, from the result above, com.ted.android is your "App Package Name" and com.ted.android.MainActivity is your "App Activity"
Start your Appium Server from Terminal with command appium
Now start your Appium Inspector
Click on Start Session, Your Appium Inspector is opened.
Voila! Now grab the elements!
Open your your Pycharm and make sure your interpreter is set properly with the required libraries.
Install Intellibot plugin
2. Test Automation Framework: I have created a basic automation framework using screen object design pattern.
I have taken this TED app and created respective screen objects and screens. Instead of pages, I named it as screens because it's mobile and screen makes sense :)!
Folder Structure:
ScreenObjects:
Screen objects are your locators on the mobile UI.
While grabbing locators from Appium Inspector, I've took xpaths with content-desc, resource-id and text attributes for Android.
With iOS the locators are Accessibility ID, ID, name and xpath with these combinations.
Sometimes, it's hard for you to find elements. So please ask your developer to add the Accessibility ID's or ID's for iOS and content-desc locator attributes for Android for your automation testing.
Screens: Create Screens instead of Pages which is similar to page object design.
The Screens will have the Screen Objects, necessary Libraries and Keywords required for each individual
The keywords are defined as for example "LandingScreen.TitleAndMessageVisible" which tells about the actions to be performed on that particular screen.
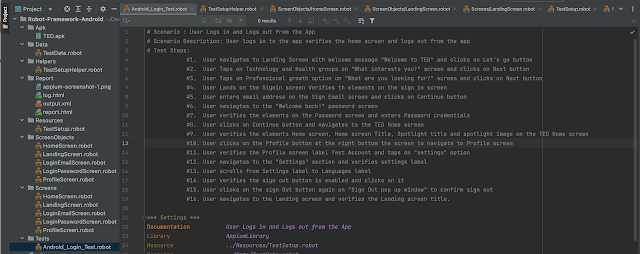
Tests: The Tests have the Scenario, Scenario Description and Test Steps defined in the Test case.
Test Setup and Test Teardown for opening and closing the application using the appium server.
Import the necessary Libraries and Resources in the settings section.
Write all your keywords with a prefix of screen names in the Test Cases section so that the test identifies the keywords written down in different screens.
Now time to execute your test :) !
Execute your test with the command : "robot -d Report Tests/Android_Login_Test.robot"
You will get a report and log html file in case on any failures to log them for you.
Console:
Test Report:
Test Output:
User Logs in verifies the home screen and logs out from the app.
Happy Automation Testing Guys :) !


Comments
Post a Comment